Categories
#100DaysofHomeLab 2FA Jus' Blogging ssh Ubuntu Uncategorized

Make SSH better with ‘convenient’ 2FA

TLDR; SSH with public-private key is quite secure, but it relies on you keeping your private key secure – a single point of failure. OpenSSH allows the additional use of one-time passwords (OTP) such as those generated via google authenticator app. This 2FA option provides for “better” security which I personally think is a good practice for ssh via wide area network access (i.e. over the intenet), but truth be told it’s not always convenient because, out-of-the-box and with most online instructions, you also have to use it when on your local area network which should be much more secure than accessing devices via the internet. Herein I describe how to setup 2FA (most important) and also how to bypass 2FA when using ssh on home lan-to-lan connections, but to always require it from anywhere outside the lan. This means your daily maintenance on-site can provide easy access to servers (using just your ssh key) whilst still protecting them with 2FA from any internet access.

My instructions below work on a July 2022 fresh install of Ubuntu 20.04 server, with OpenSSH installed (‘sudo apt update && sudo apt install openssh-server’ on your server if you need to do this). I further assume right now that you have password access to this server, which is insecure but we will fix that. I also assume the server is being accessed from a July 2022 fresh install of Ubuntu Desktop (I chose this to try to make it easier – I can’t cover all distros/setups of course).

The instructions for by-passing lan are right at the end of this article, because I spend a lot of time trying to explain how to install google-authenticator on your phone/server (which takes most of the effort). If you already have that enabled, just jump to the END of this article and you will find the very simple steps needed to bypass 2FA for lan access. For anyone else who does NOT use 2FA for ssh, I encourage you to read and try the whole tutorial.

WARNING – these instructions work for me, but your mileage may vary. Please take precautions to make backups and practice this on virtual instances to avoid being locked out of your server! With that said, let’s play:

INSTRUCTIONS

Firstly, these instructions require the use of a time-based token generator, such as google’s authenticator app. Please download and install this on your phone (apple store and play store both carry this and alternative versions). We will need this app later to scan a barcode which ultimately generates one time passwords. The playstore app is located here. Apple’s is here, Or just search the app stores for ‘google authenticator’ and match it with this:
Install it, that’s all you need to do for now.

On your desktop, create an ssh key if required, e.g. for the logged-in user (in my case, username ‘og’) with an email address of [email protected]:

ssh-keygen -t rsa -b 4096 -C "[email protected]"

Enter a file name, or accept the default as I did (press ‘Enter’). Enter a passphrase for the key if you wish (for this demo, I am not using a passphrase, so I just hit enter twice). A passphrase more strongly protects your ssh key. You should see output like this:
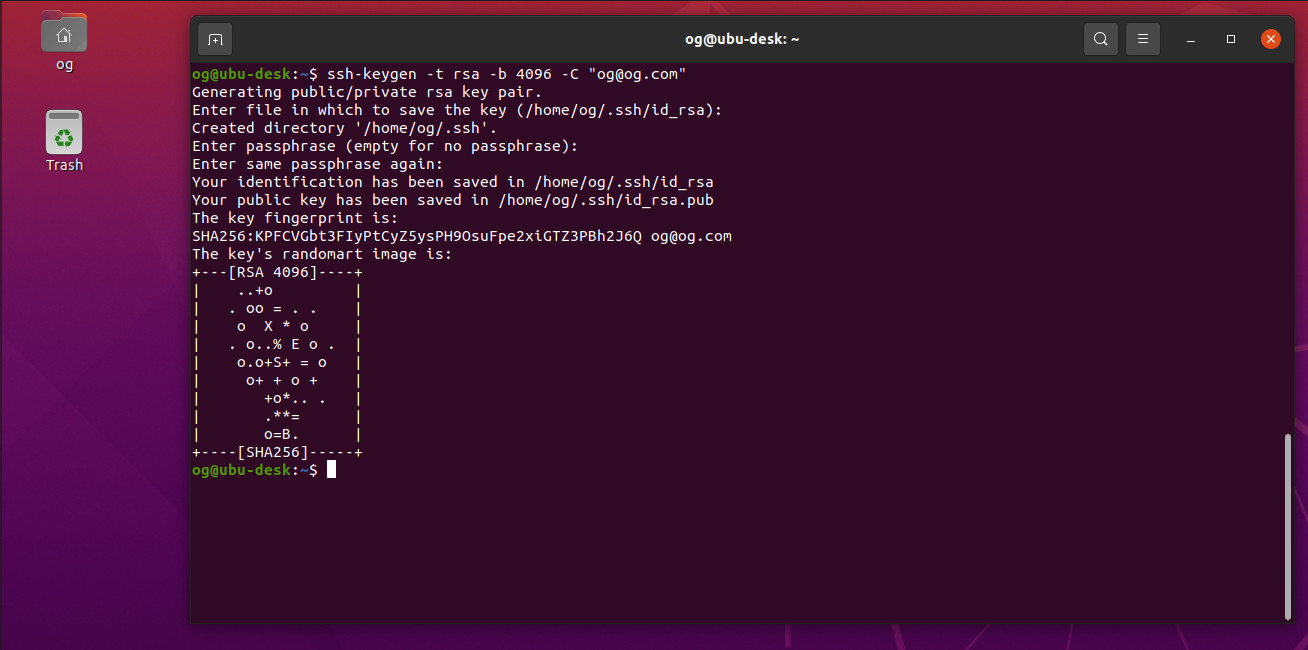
If you now check, you will see a new folder created called .ssh – let’s look inside:
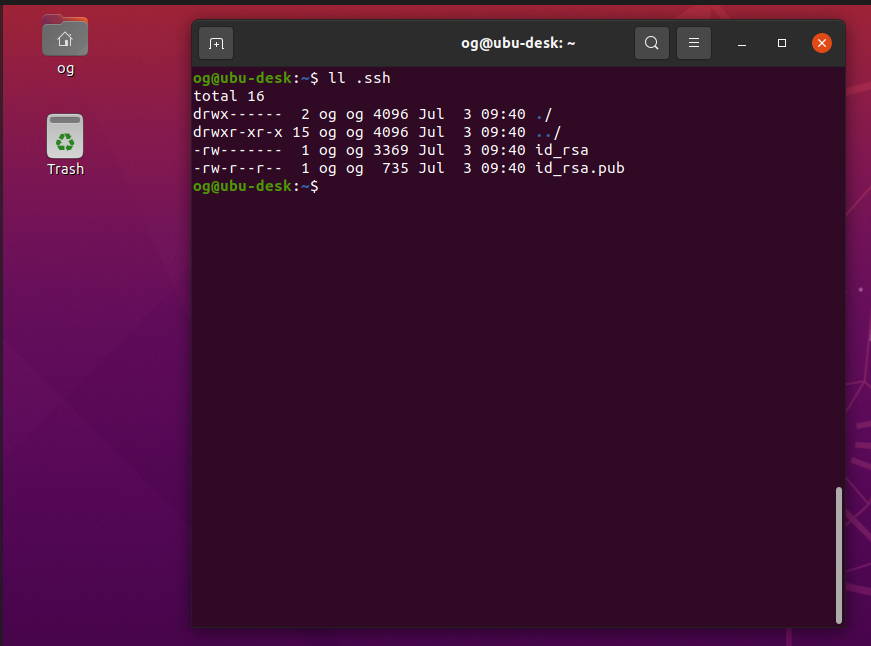
id_ras is the PRIVATE key, id_rsa.pub is the PUBLIC key – we need both

Now let’s copy the ssh key to our server. We assume our server is on ip 10.231.25.145, and your username is og in the commands below. Please change the IP and username for yours accordingly:

ssh-copy-id [email protected]

In my case, this was the first time I accessed this server via ssh, so I also saw a fingerprint challenge, so I was first presented with this, which I accepted (type ‘yes’ and ‘Enter’):

The server then prompts you for your username credentials:

Enter your password to access the server then you will see this message:
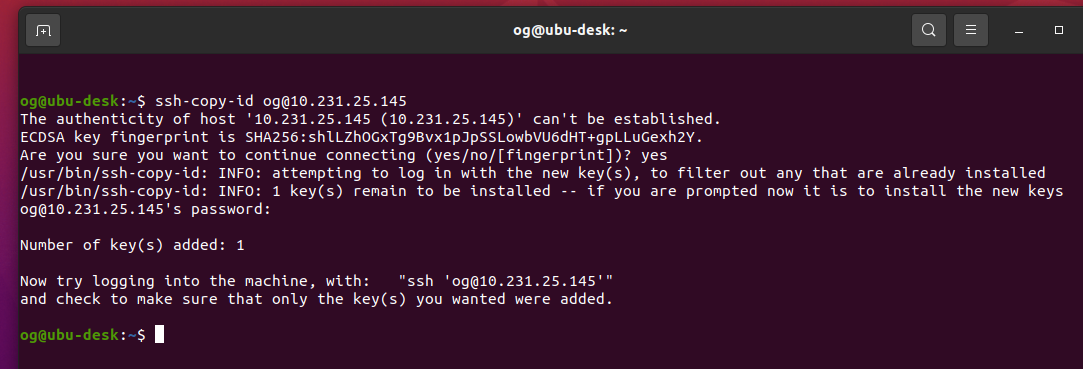
Prove it by logging in as suggested in the screen prompt that you have (in mine, it says ‘try logging into the machine, with ssh [email protected]’ – yours will be different), you should see something like this:
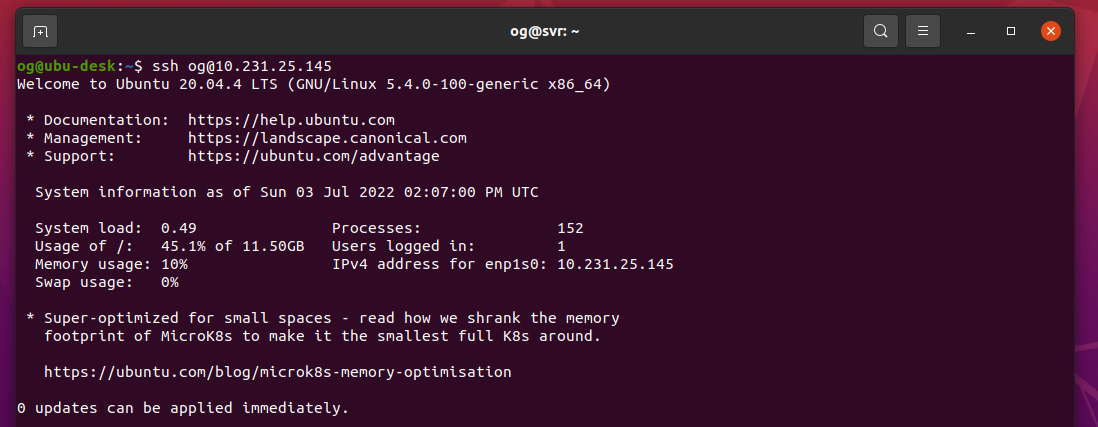
Stage 1 complete – your ssh key is now in the server and you have passwordless and thus much more secure access. Note, if you secured your ssh key with a password, you will be prompted for that every time. There are some options for making that more conveneient too, but that’s right at the very end of this article. Further note: DO NOT delete or change your ssh key as you may otherwise get locked out of ssh access for your server after you make additional changes per below, as I intend to remove password access via ssh to the server:

Log back into your server if required, then edit your ssh config file to make some basic changes needed for key and 2FA access:

sudo nano /etc/ssh/sshd_config

(Here is my complete file, including the changes highlighted in bold red):

#	$OpenBSD: sshd_config,v 1.103 2018/04/09 20:41:22 tj 
# This is the sshd server system-wide configuration file.  See
# sshd_config(5) for more information.
# This sshd was compiled with PATH=/usr/bin:/bin:/usr/sbin:/sbin
# The strategy used for options in the default sshd_config shipped # with
# OpenSSH is to specify options with their default value where
# possible, but leave them commented.  Uncommented options 
# override the
# default value.

Include /etc/ssh/sshd_config.d/*.conf

#Port 22
#AddressFamily any
#ListenAddress 0.0.0.0
#ListenAddress ::
#HostKey /etc/ssh/ssh_host_rsa_key
#HostKey /etc/ssh/ssh_host_ecdsa_key
#HostKey /etc/ssh/ssh_host_ed25519_key
# Ciphers and keying
#RekeyLimit default none

# Logging
#SyslogFacility AUTH
#LogLevel INFO

# Authentication:

#LoginGraceTime 2m
#PermitRootLogin prohibit-password
#StrictModes yes
#MaxAuthTries 6
#MaxSessions 10

PubkeyAuthentication yes

# Expect .ssh/authorized_keys2 to be disregarded by default in future.
#AuthorizedKeysFile	.ssh/authorized_keys .ssh/authorized_keys2

#AuthorizedPrincipalsFile none

#AuthorizedKeysCommand none
#AuthorizedKeysCommandUser nobody

# For this to work you will also need host keys in /etc/ssh/ssh_known_hosts
#HostbasedAuthentication no
# Change to yes if you don't trust ~/.ssh/known_hosts for
# HostbasedAuthentication
#IgnoreUserKnownHosts no
# Don't read the user's ~/.rhosts and ~/.shosts files
#IgnoreRhosts yes

# To disable tunneled clear text passwords, change to no here!
PasswordAuthentication no
#PermitEmptyPasswords no

# Change to yes to enable challenge-response passwords (beware issues with
# some PAM modules and threads)
ChallengeResponseAuthentication yes

# Kerberos options
#KerberosAuthentication no
#KerberosOrLocalPasswd yes
#KerberosTicketCleanup yes
#KerberosGetAFSToken no

# GSSAPI options
#GSSAPIAuthentication no
#GSSAPICleanupCredentials yes
#GSSAPIStrictAcceptorCheck yes
#GSSAPIKeyExchange no

# Set this to 'yes' to enable PAM authentication, account processing,
# and session processing. If this is enabled, PAM authentication will
# be allowed through the ChallengeResponseAuthentication and
# PasswordAuthentication.  Depending on your PAM configuration,
# PAM authentication via ChallengeResponseAuthentication may bypass
# the setting of "PermitRootLogin without-password".
# If you just want the PAM account and session checks to run without
# PAM authentication, then enable this but set PasswordAuthentication
# and ChallengeResponseAuthentication to 'no'.
UsePAM yes

#AllowAgentForwarding yes
#AllowTcpForwarding yes
#GatewayPorts no
X11Forwarding yes
#X11DisplayOffset 10
#X11UseLocalhost yes
#PermitTTY yes
PrintMotd no
#PrintLastLog yes
#TCPKeepAlive yes
#PermitUserEnvironment no
#Compression delayed
#ClientAliveInterval 0
#ClientAliveCountMax 3
#UseDNS no
#PidFile /var/run/sshd.pid
#MaxStartups 10:30:100
#PermitTunnel no
#ChrootDirectory none
#VersionAddendum none

# no default banner path
#Banner none

# Allow client to pass locale environment variables
AcceptEnv LANG LC_*

# override default of no subsystems
Subsystem	sftp	/usr/lib/openssh/sftp-server

# Example of overriding settings on a per-user basis
#Match User anoncvs
#	X11Forwarding no
#	AllowTcpForwarding no
#	PermitTTY no
#	ForceCommand cvs server
AuthenticationMethods publickey,keyboard-interactive

(END OF FILE)

Note there is a LOT MORE you can do to configure and secure ssh, but these changes (when completed - inc. below) will make for a much more secure installation than what you get 'out of the box'.  

Now install the server version of google-authenticator on your server - this is what we 'syncronise' to your phone:

sudo apt install -y libpam-google-authenticator

Now configure authenticator by typing the following command and hitting 'Enter':

google-authenticator

Enter 'y' at the first prompt and you will see somehing like this:
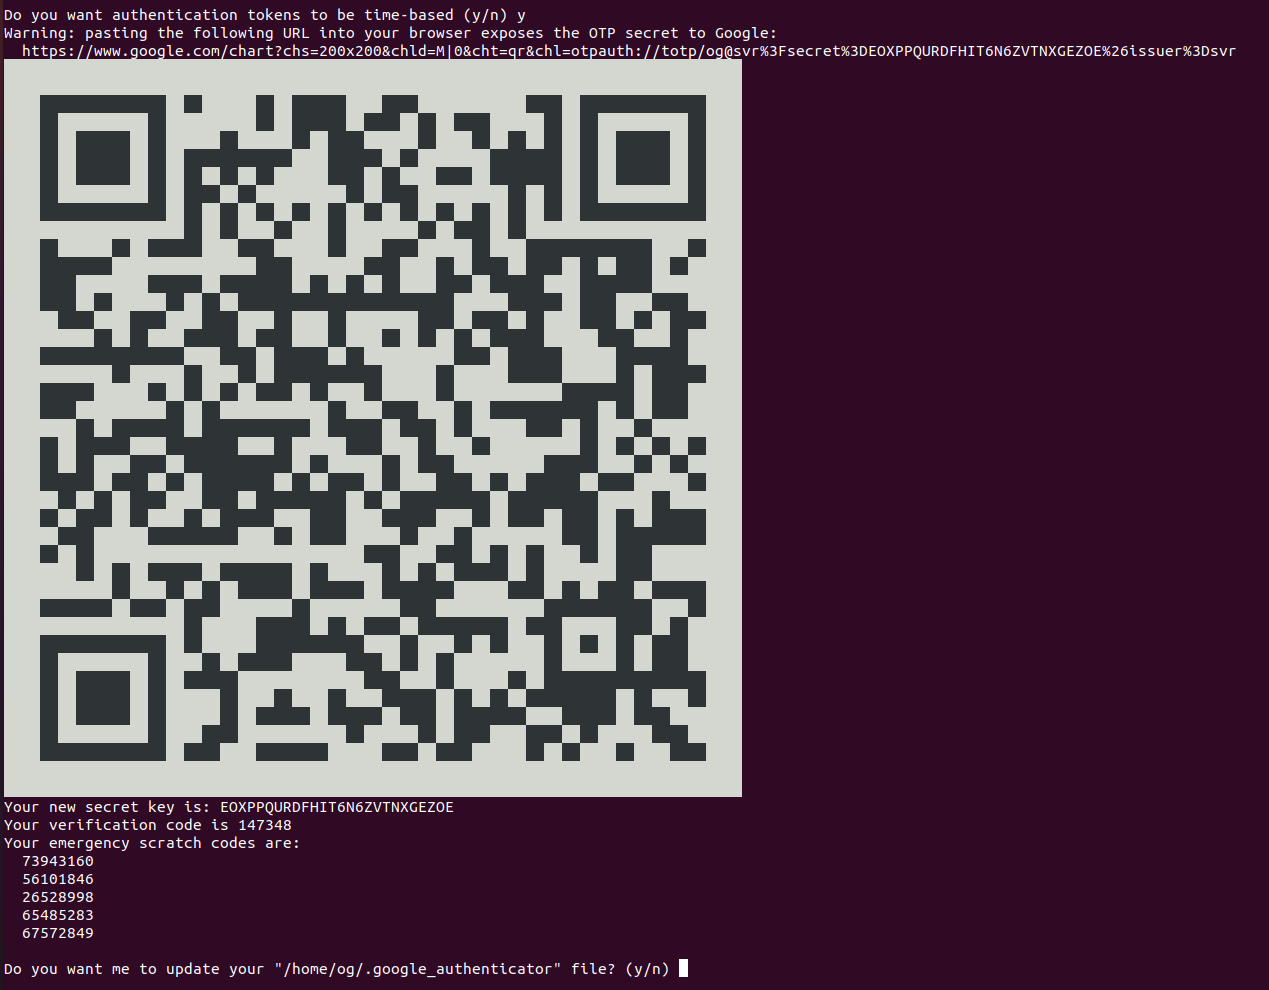
The QR code is your google authenticator 2FA key. Enter this into your phone app by opening the app and scanning the QR code generated on your screen. The authenticator app uses the above QR code (key) to generate seemingly random numbers that change every 30 seconds. This is our 2FA code and using it as part of your ssh login it makes it MUCH HARDER for someone to hack your ssh server.

PRO TIP: Also, take a screenshot of your QR code (i.e. the above) and save it in a very secure place (offline?) so you can re-create your 2FA credential if you ever e.g. lose your phone. It saves you having to reset everything, but keep it VERY SECURE (like your rsa private key).

Accept ‘y’ to update the google authenticator file. I accepted all the default prompts too, and that’s a pretty good setup so I recommend you do the same. Once you are done, you should see something like this:
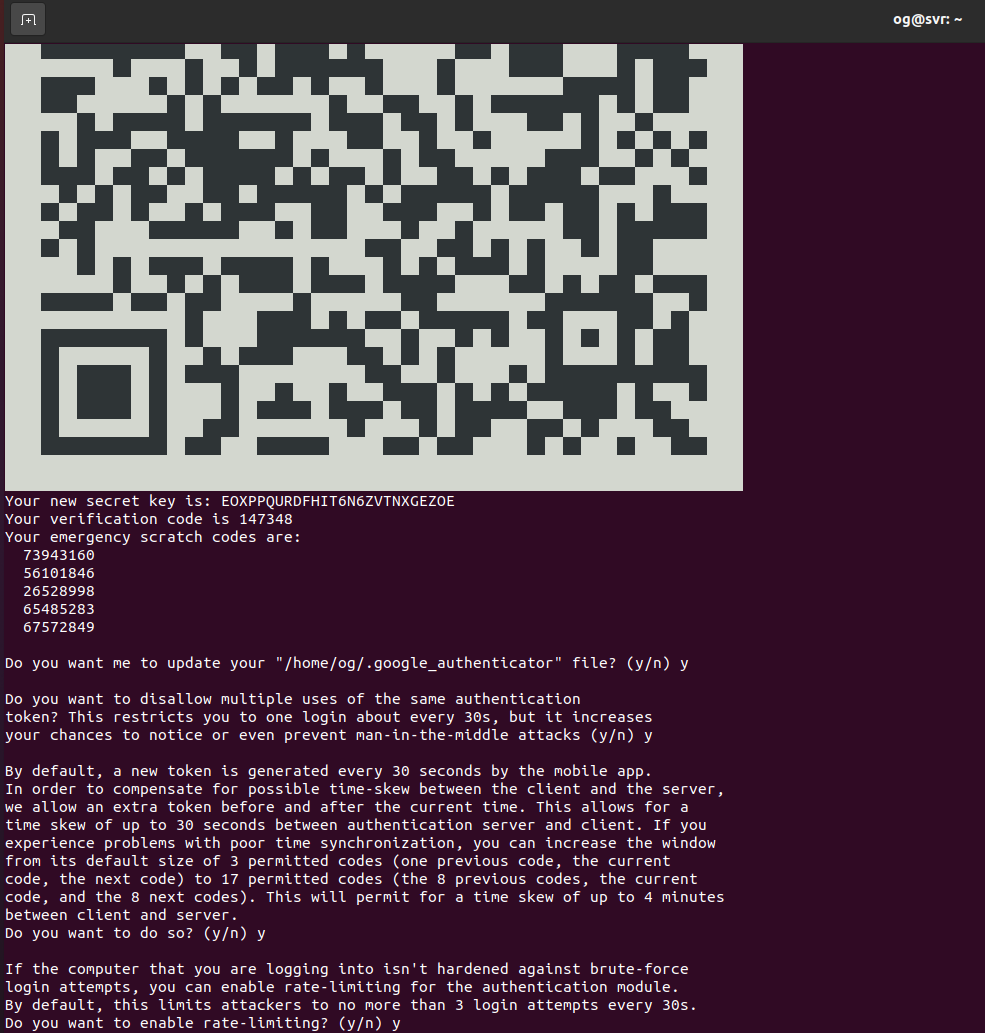
Now edit the following file on your server:

sudo nano /etc/pam.d/sshd

Comment out the ‘@include common-auth’ statement at the top of the file by making it look like this:

# @include common-auth

(This disables the use of password authentication, which is very insecure, especially if you have a weak password). Then add these 2 lines to the end of the file:
auth required pam_google_authenticator.so
auth required pam_permit.so

Save the file. Now restart the ssh server using:

sudo systemctl restart ssh

Now open a NEW terminal window on our desktop (do not close the original window – we need that to fix any mistakes, e.g. a typo). Ssh back into your server using this second terminal window. If all has gone well, you will be prompted to enter the google-authenticator code from the app on your phone:

Enter the 2FA code from your smartphone google-authenticator app and hit enter, this should get you back at the terminal of your server, logged in SECURELY and using an SSH-key AND 2FA credentials. If all has further gone well, you will be greeted with your login screen – something like:
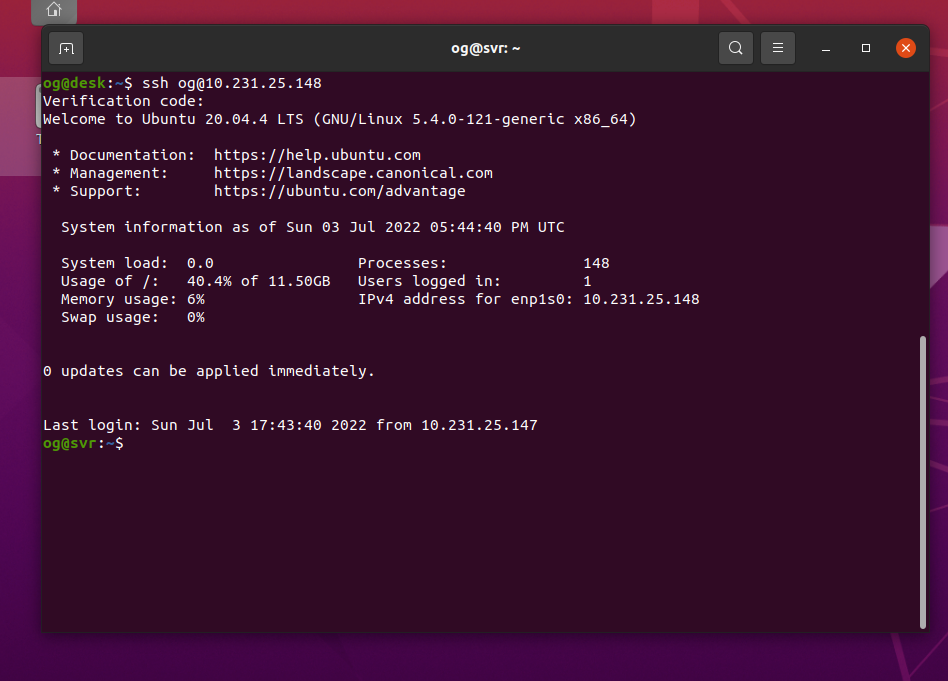
CONGRATULATIONS! You have now enabled 2FA on your server, making it much more secure against hackers. Your server is now much safer than the out-of-the-box method that uses a password only to secure a server. NOTE if you are unable to login, use the original terminal to edit your files and fix typo’s etc. DO NOT close the original terminal window until you have 2FA working, else you will lock yourself out of your server and will have to use a mouse, keyboard and monitor to regain access.

But we are not done yet – if you recall, I said we want to make this convenient, and this is the really EASY part. Log back into your server (if required) then re-open the /etc/pam.d/sshd file:

sudo nano /etc/pam.d/sshd

Add the following line above the prior two entries you made earlier (note that in my version below, the string wraps to two lines but it should all be on a single line):

auth [success=1 default=ignore] pam_access.so accessfile=/etc/security/access-local.conf

So to be clear, the end of your file (i.e. the last three lines of /etc/pam.d/sshd) should look like this:

Save the file. Now create and edit the following file. This is where we will make this configuration work differently for lan vs wan access:

sudo nano /etc/security/access-local.conf

Enter something like this, but change the 10.231.25.1/24 IP range to your lan. For example, if your lan is 192.168.1 to 192.168.1.255, enter 192.168.1/24. Mine is 10.231.25.1/24, so I use the following

+:ALL : 10.231.25.1/24
+:ALL: LOCAL
+:ALL:ALL

I know that looks a little…strange, but it will bypass 2FA requirements when the originating IP is as shown in line 1. My file looks like this:
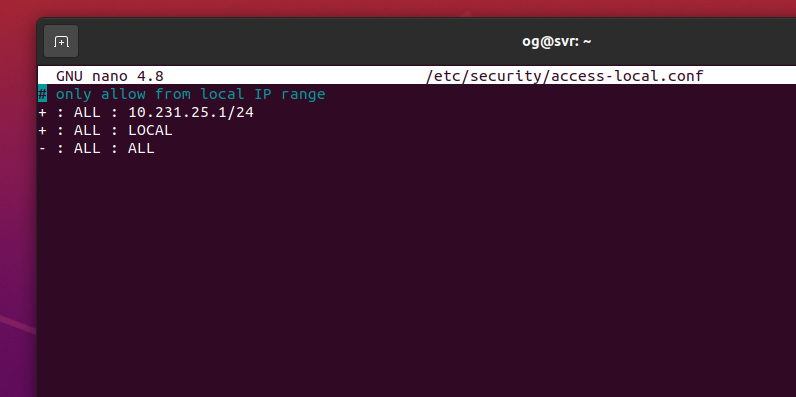
Save the file, quit your server then re-login to your server (no need to restart even the ssh-server – this works straight away). You are immediately greeted with your login screen – no 2FA credential is required:
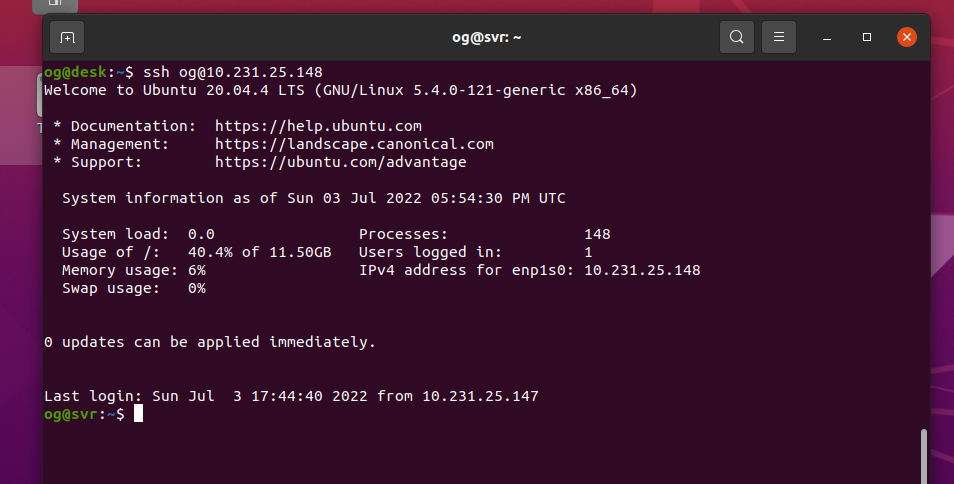
So you are no longer asked for any 2FA key, but only because you logged in from your lan. That’s because the server knows you are accessing ssh from your lan (i.e. in my case, an address in the range 10.231.25/1 to 10.231.25.255 in the above example), so it will bypass the need for 2FA. If you try to login via any other ip range – say a wifi hotspot in a hotel, or indeed ANY different network you will need to enter your 2FA credentials in addition to having the ssh key of course (which you need for lan access too – i.e. the .ssh/id_rsa keyfile).

BONUS TIP – remember I touched on the use of passwords for rsa keys. They too are useful but can be “inconveneient” to re-type every time. There are password caching mechanisms for logins (google is your friend), but you can also make this “even more secure” and yet still very convenient for lan acccess by adding a password to the copy of your private rsa key that you use to access the server remotely, but dispense with that for the ssh key you use to access it locally.

I hope this tutorial helped. Comments very welcome and I will try to answer any questions too! I can be reached on @OGSelfHosting on Twitter.
Categories
#100DaysofHomeLab Jus' Blogging keepalived lxd Ubuntu Uncategorized

Nextcloud Fail-over

I have operated a Nextcloud instance for several years. It has completely replaced DropBox, OneDrive and even Google Drive for me. However, my single-instances of Nextcloud have occasionally had downtime (power cuts, server issues and especially ‘administrator configuration fubars’). I have experimented with a Nextcloud failover service to try to improve mmy uptime, and it’s now in ‘experimental operation’.

At the present time, I now have TWO instances running on two different hardware platforms. Both instances run in a virtual environment. One, running on my new dual-EPYC server, is the primary instance intended to be in operation ‘all of the time’. The other, on a purpose-built server based on consumer hardware, is a mirror of the primary instance but theoretically is always hot and able to come online at a moments notice. If my primary server goes down, the backup takes over in about 1-3 seconds.

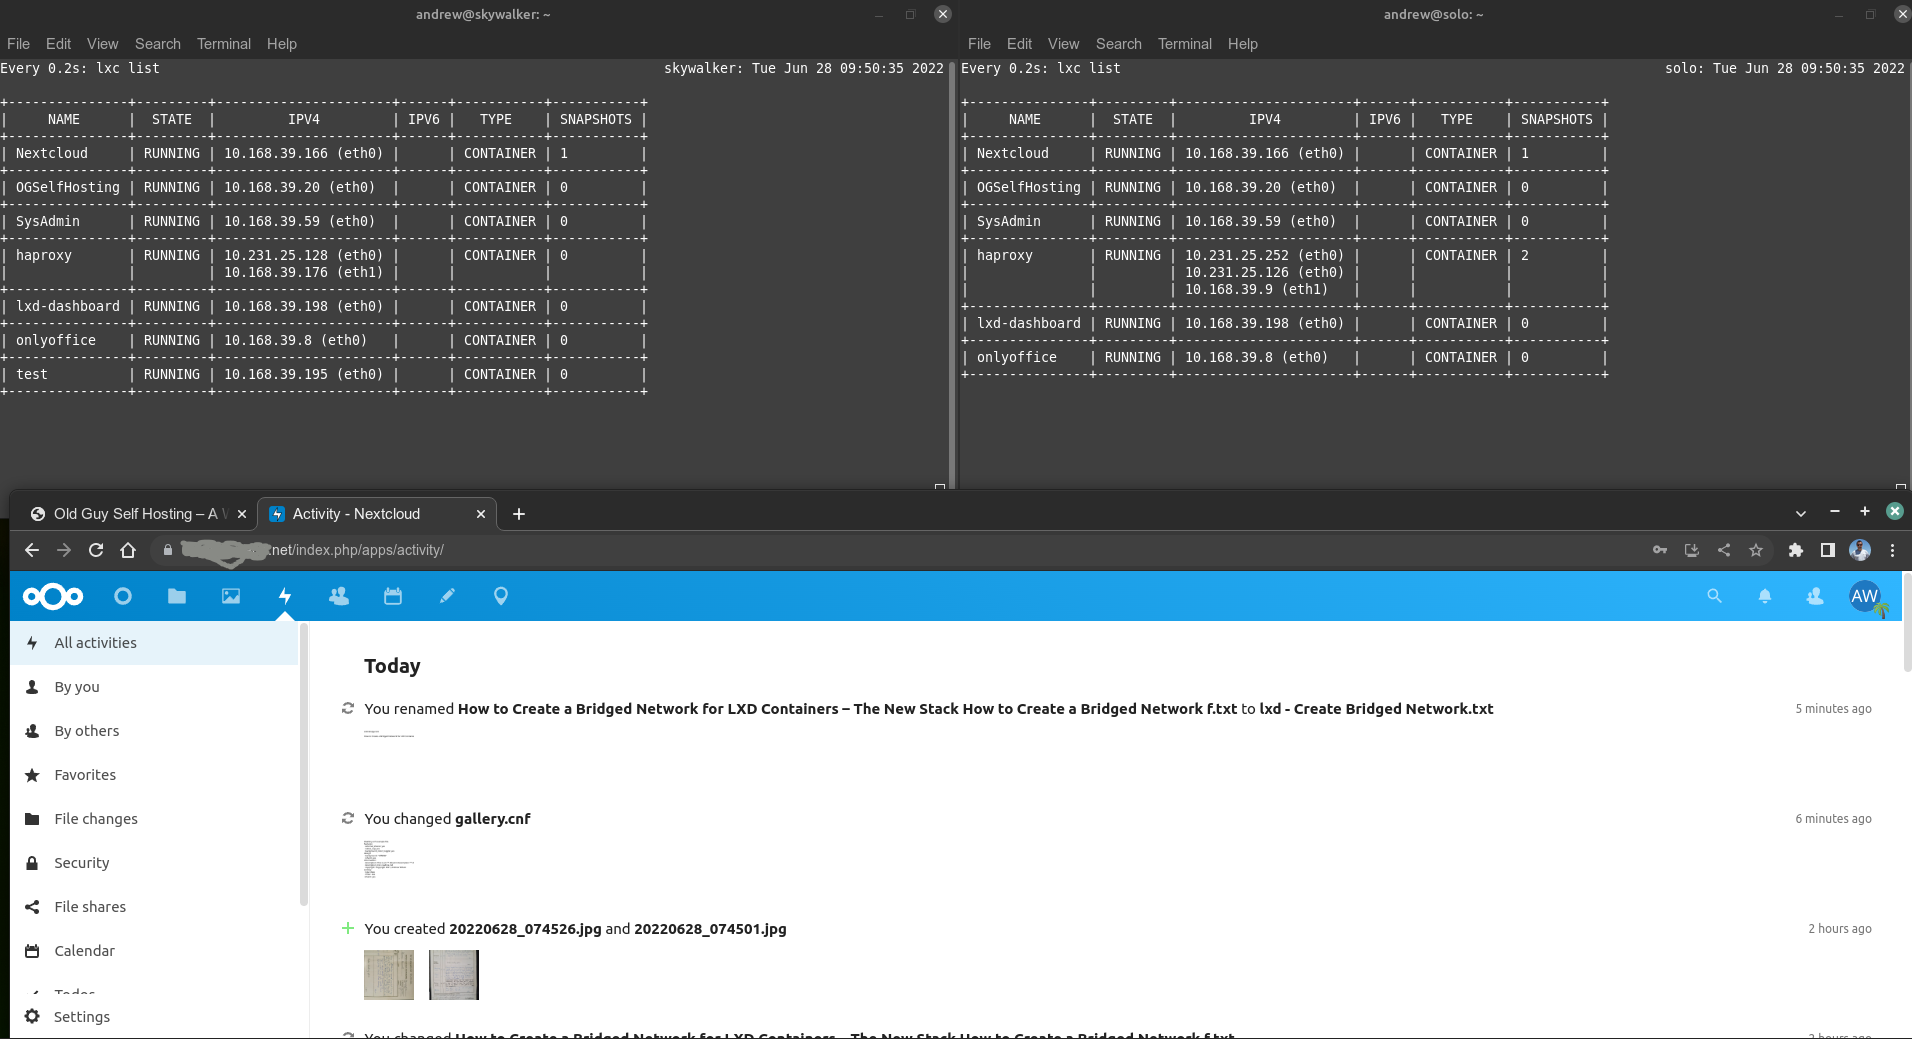
Primary Nextcloud container running on server1 (top right), backup on server2 (top left)

I rely upon two key software packages to help me make this happen: (1) lxd, which I use to run all my containers and even some of my vm’s (I suspect Docker would work equally well); and (2) keepalived, which provides me with a ‘fake’ IP I can assign to different servers depending on whether they are operational or not.

I am going to run this service with just two instances (i.e. one fail-over server). For now, both services are hosted in the same physical property and use the same power supply – so I do not have professional-grade redundancy (yet). I may add a third instance to this setup and even try to place that in a different physical location which would considerably improve robustness against power loss, internet outages etc. But that’s for the future – today I just finally have some limited albeit production-grade fail-over capability. I shall see if this actually makes my reliably better (as intended), or if the additional complexity just brings new problems that make things worse or at least no-better.

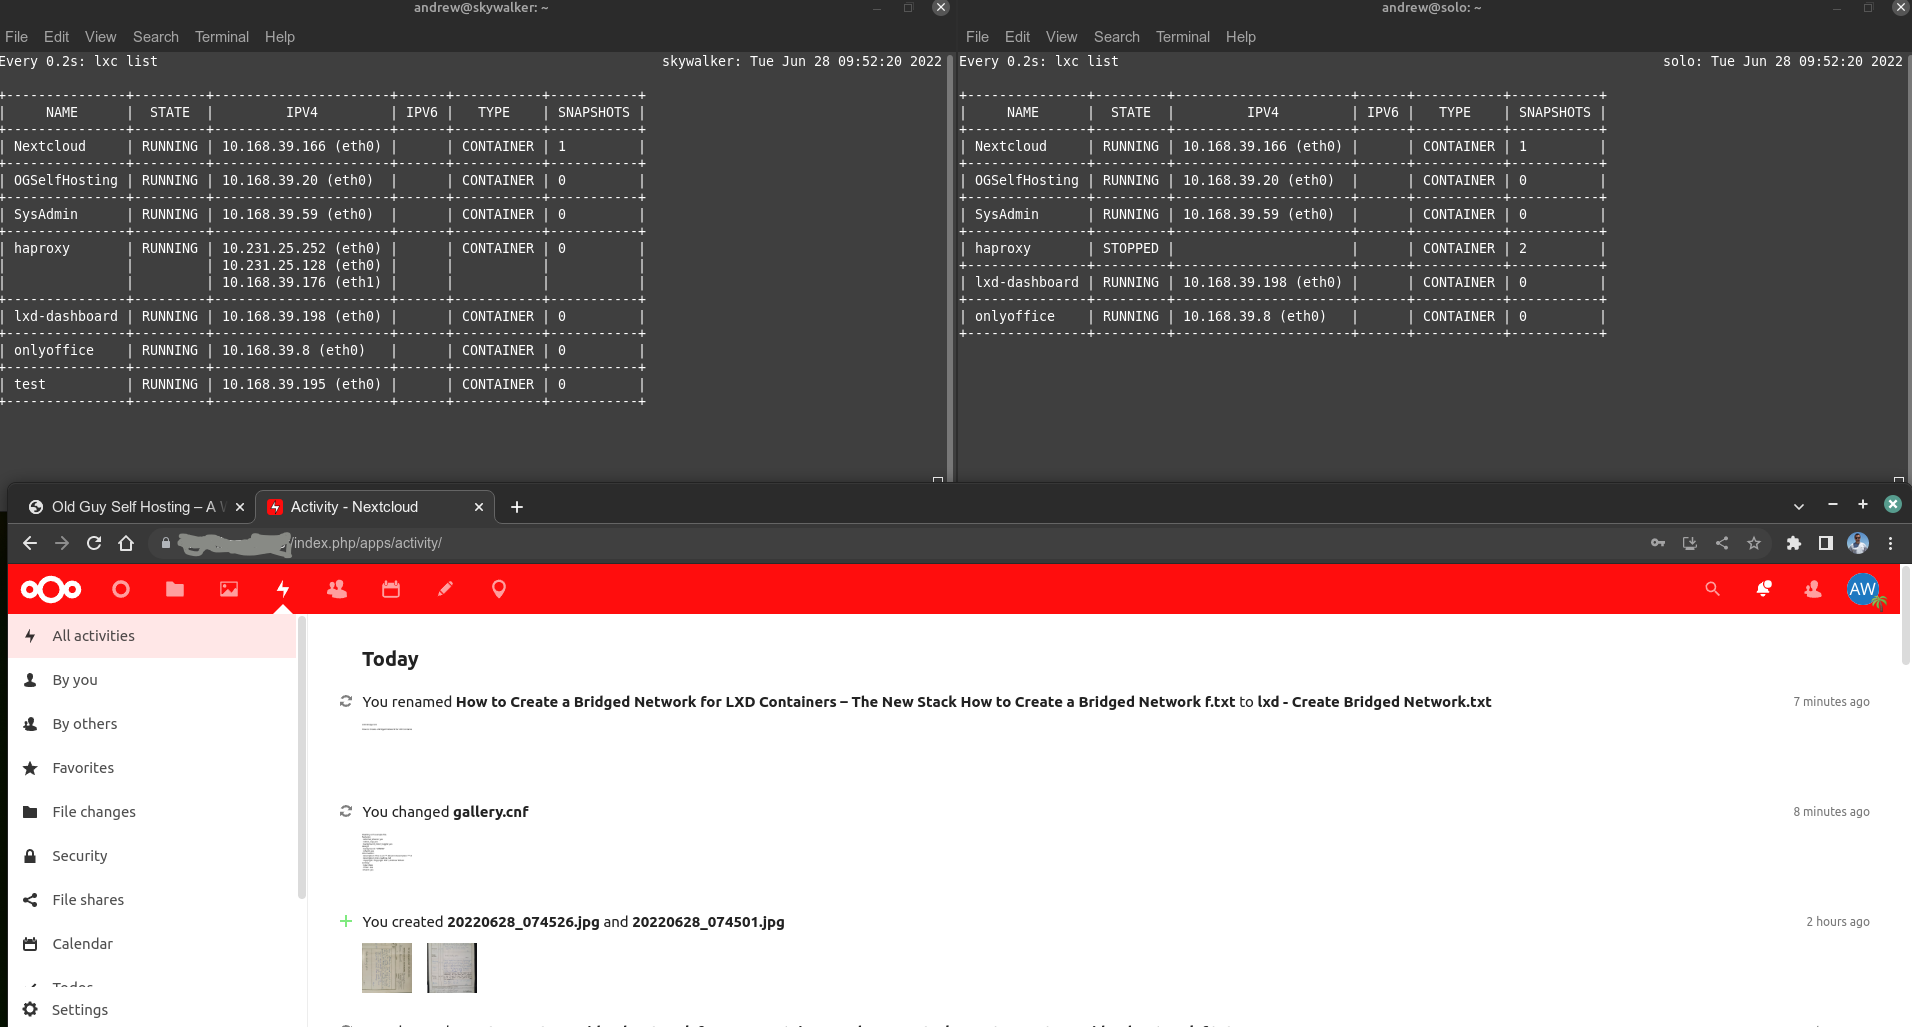
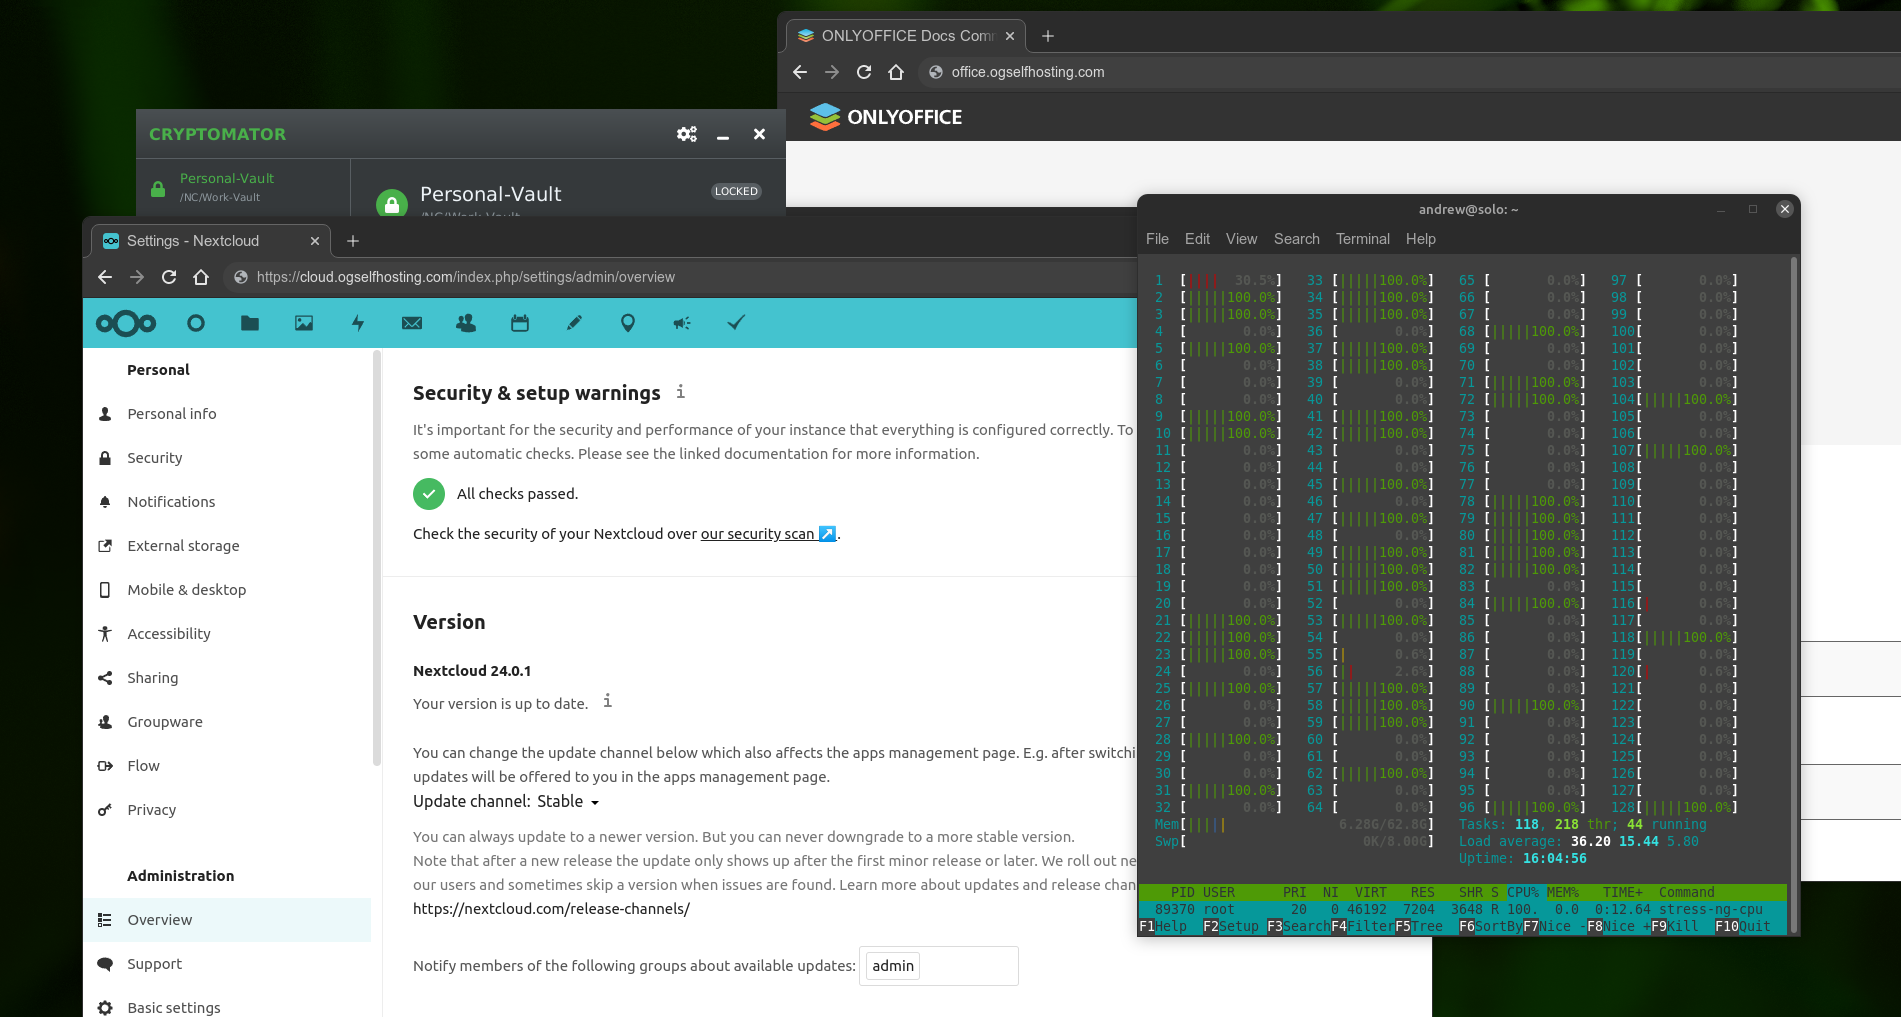
Server2 has kicked-in when I shutdown server 1.

A couple of additional details – I actually hot-backup both my Nextcloud server and a wordpress site I operate. As you can also see from the above image, I also deliberately change the COLOR of my Nextcloud banners (from blue to an unsubtle RED) just to help me realize something is up if my EPYC server goes down since I don’t always pay attention to phone notifications. I only perform a one-way sync, so any changes made to a backup instance will not be automatically regenerated on the primary server as/when it comes back online after a failure. This is deliberate, to reduce making the setup too complicated (which could otherwise not go unpunished!). A pretty useful feature: my ENTIRE Nextcloud instance is hot-copied – links, apps, files, shares, sql daabase, ssl certs, user-settings, 2FA credentials etc. Other than the color of the banner ( and a pop-up notification), the instances are ‘almost identical’*. Lxd provides me with this level of redundancy as it copies everything when you use the refresh mode. Many other backup/fail-over implemetations I have explored in the past do not provide the same level of easy redundency for a turn-key service.

(*) Technically, the two instances can never be truly 100.0000000…% identical no matter how fast you mirror an instance. In my case, there is a user-configurable difference between the primary server and the backup server at the time of the fail-over coming online. I say user-cobfigurable because this is the time delay for copying the differences between server1 and server2. I configure this via the scheduling of the ‘lxc copy –refresh’ action. On a fast network, this can be as little as a minte or two, or potentially even faster. For my use-case, I accept the risk of losing a few minutes worth of changes, which is my maximum risk for the benefit of having a fail-over service. Accordingly, I run my sync script “less frequently” and as of now, it’s a variable I am playing with vs running a copy –refresh script constantly.

If anyone has any interest in more details on how I configure my fail-over service, I’ll be happy to provide details. Twitter: @OGSelfHosting

Categories
#100DaysofHomeLab Jus' Blogging luks Ubuntu zfs

ZFS on LUKS

How to luks-encrypt and auto-unlock a drive used for zfs storage

I have seen some onlne articles that misleadingly state that you can’t have a luks layer on zfs used in an lxd pool, because the pool will disappear after a reboot. Such as this github posting here. The posting is unfortunate because I think the question and answer were not aligned and so the suggestion that comes from the posting is that this can’t be done and the developers are not going to do anything about it. I think they each missed each others points.

Fact is, creating a zpool out of a luks drive is quite easy – be it a spinning harddrive, an SSD or an NVMe. I will walk though an example of creating a luks drive, creating a zfs zpool on top of that, and having the drive correctly and automatically decrypt and get imported into zfs at boot. The resultant drive has data FULLY ENCRYPTED at rest (i.e. in a pre-booted or powered off state). If someone takes your drive, the data on it are inaccessible.

But first….

WARNING WARNING – THE INSTRUCTIONS BELOW WILL WIPE A DRIVE SO GREAT CARE IS NEEDED. WE CANNOT HELP YOU IF YOU LOSE ACCESS TO YOUR DATA.  DO NOT TRY THIS ON A PRODUCTION SERVER.  EXPERIMENT ON DRIVES THAT ARE EITHER BARE OR CONTAIN DATA YOU DO NOT VALUE ANYMORE. SEEK PROFESSIONAL HELP IF THIS IS UNCLEAR, PLEASE!

Now, with that real warning out of the way, let’s get going. This tutorial works on linux debian/ubuntu – some tweaking may be needed for RH and other flavors of linux.

I will assume the drive you want to use can be found in /dev as /dev/sdx (I deliberately chose sdx as it’s less likely you can make a mistake if you cut and paste my commands without editing them first!). Be ABSOLUTELY CERTAIN you have identified the right designation for your drive – a mistake here will be … very unfortunate.

We need to first create our luks encryption layer on the bare drive.

Last warning – THE INSTRUCTIONS BELOW WILL ABSOLUTELY WIPE YOUR DRIVE:

sudo cryptsetup luksFormat /dev/sdx

The above command will ask for your sudo password first then it will ask for the encryption password for the disk. Make it long and with rich character depth (upper/lower case, numbers, symbols). Note that the command luksFormat contains an upper case letter. It’s common in all the commands – so be precise in your command entry.

Now immediately open the new encryted disk, and give it a name (I am using sdx_crypt):

sudo cryptsetup luksOpen /dev/sdx sdx_crypt

You now have access the this disk in /dev/mapper (where luks drives are located). So we can create our zpool:

sudo zpool create -f -o ashift=12 -O normalization=formD -O atime=off -m none -O compression=lz4 zpool  /dev/mapper/sdx_crypt

You can of course change our zpool parameters, obviously including the name, to your liking. But this is now a working luks encrypted zpool. You can use this in e.g. lxd to create a fully at-rest encrypted data drive which is protected in the case of e.g. theft of hardware.

But we are not quite done yet. Unless you enjoy typing passwords into your machine at every boot for every encrypted drive then we need one more additonal but technically ‘optional’ step – to automatically unlock and zfs-import this drive at boot (optional because you can enter this manually at every boot if you are really paranoid).

We do this by creating a file (similar to your password), but we store it in a /root folder, making it accessible only to root users. We use this file content to act as a password for decrypting the luks drive:

sudo dd if=/dev/urandom of=/root/.sdx_keyfile bs=1024 count=4
sudo chmod 0400 /root/.sdx_keyfile

The above two commands create a random binary file and store it in the folder /root. This file is not accessible to anyone without root privileges. We now firstly apply this key file to our encrypted disk:

sudo cryptsetup luksAddKey /dev/sdx /root/.sdx_keyfile

(You will be asked to enter a valid encryption key – it uses this to add the binary file to the luks disk header. Use the strong password you created when you formatted the drive earlier).

So now, your drive is luks encrypted with your password AND with this file. Either can decrypt the drive.

Now all we need to do is add another entry to our /etc/crypttab file, which is what linux uses at boot to decrypt and mount files. So let’s get a proper identity for our drive – somthing that will not change even if you move the disk to a different computer or plug it into a different sata port etc.:

sudo blkid

This command will bring up a list of your atatched drives and their block id’s. E.g, here’s an abridged version of mine:

What you need to look for is the entry that matches your luks drive, it will look something like this – note that there are two entries of interest, but we only need ONE:

/dev/sdx: UUID=”d75a893d-78b9-4ce0-9410-1340560e83d7″ TYPE=”crypto_LUKS”

/dev/mapper/sdx_crypt: LABEL=”zpool” UUID=”6505114850985315642″ TYPE=”zfs_member”

We want the /dev/sdx line (intentionally bolded, above in the example output). Do NOT use the /dev/mapper/sdx_crypt UUID. Carefully copy the UUID string (‘d75a893d-78b9-4ce0-9410-1340560e83d7’, in the above example). Now, open the system crypttab file as root and add an entry like below, but using your exact and full UUID from your /dev/sdx blkid command output:

sudo nano /etc/crypttab

Add the following at the bottom of the file:

#Our new luks encrypted zpool drive credentials
#Note this gets automatically unlocked during the boot cycle
#And then it gets automatically imported into zfs and is immediately #available as a zfs zpool after the system bootup is complete.
#Add the following as one continuous line then save, quit & reboot:

sdx_crypt UUID=d75a893d-78b9-4ce0-9410-1340560e83d7 /root/.sdx_keyfile luks,discard

Now reboot. Assuming your boot partition is encrypted, you will have to unlock that as normal, but then the magic happens: linux will read the crypttab file, find the disk and decrypt it using the /root/.sdx_keyfile, then pass the decrypted drive (called sdx_crypt) to zfs who will be able to import and access the zpool as normal. no delays, no errors – it just WORKS!

If you want to be 100% sure you really have an encrypted drive then, ether unmount and lock the drive locally (in which case your zpool will disappear). Or, for a more extreme test, power off your system, take the drive out and examine it on another compter – you will see the drive is a luks drive. You cannot read any data on it unless you decrypt it, and you need that /root/.sdx_keyfile or the password. At rest, powered off, your data is secure. Put the disk back into your computer (any sata port – we use credentials that identify this specific drive) and boot up – voila, your zpool will reappear.

Note that this method is very secure. It will be impossie to access this disk without unless you either have the very strong password you used to encrypt the drive or the /root/.keyfile. The latter can only be read by root-level user.

This is how we roll luks. Literally ALL of our servers, desktops and drives are setup this way. It does require the manual unlocking of the boot drive after every bare metal machine reboot, but we can do that even remotely. We think that the peace of mind for protecting our data are worth this inconvenience. (I can show how I decrypt the root partition over ssh in another article – let me know if that interests you). Good luck with your luks’ing.

Andrew

Categories
#100DaysofHomeLab Jus' Blogging

Self-hosting can be Epyc

TLDR; I built a dual-cpu EPYC-based server in a tower case for home networking – and it’s really cool, literally!

I have spent some time over the last few days assembling, configuring and testing my over-the-top home-server, the heart of which has dual first-generation AMD Naples 32-core EPYC 7601 CPU’s. This posting is an initial quick-look at my system – just to get something out there in case others are looking at doing something similar – there’s not a lot of homelab information on dual-core Epyc setups (probably because they are way in excess of the capabilities you need for average homelab workloads).

I have a major goal for this build of being a capable but QUIET system that fits in a home environment in a Tower with some RGB bling so it looks cool too. Hardware wise the system consists of:

  • Two used AMD EPYC 7601 CPU’s – 32 cores each, 2.2 GHz base clock and up to 3.2 GHz max boost clock depending on the load/usage
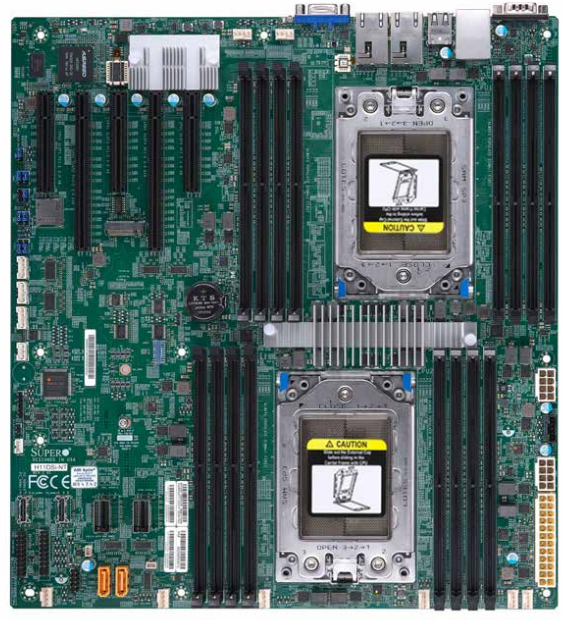
  • A used SuperMicro H11DS i -NT motherboard – highlights
H11DSi-NT Motherboard Image (supermicro.com)
  • 256 GB ECC registered 2666MHz memory (16x16GB modules)
  • Three Kingston 2-TB PCIE-3 NVME’s
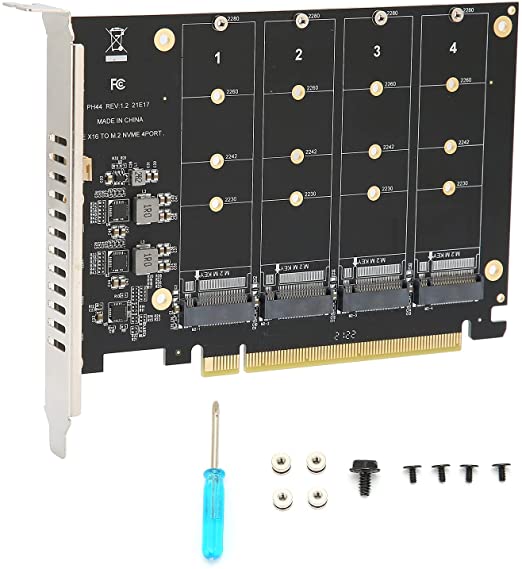
    • Courtesy of one of the PCIE 3.0 x16 lane that’s holding a quad NVME adapter:
Quad M.2 NVME SSD to PCI-E 4.0 X16 Adapter – 3rd party accessory
  • One Samsung EVO 4TB SSD
  • Two Kingston 256GB NVME (one for the OS – Ubuntu 20.04 server, one for my Timeshift backups)
  • Two x Noctua NH-U14S TR4-SP3 cooling fans
  • All of this is housed in a Fractal Torrent E-ATX RGB case which has 2 x 180mm and 3x 140mm regular cooling fans. I went with Fractal and Noctua because I wanted very low operational noise and effective cooling, and I went with a Tower configuration and upgraded to RGB because this sits in my home office and we at home want this to look cool as it’s visible in the home space.

Back in the distant day of 2018, the CPU’s alone cost over $4k each, but AMD have had two generational releases of EPYC since then – Rome and Milan, causing the price of Naples hardware to plummet as is common. I thus got these two flagship Naples CPU’s and motherboard for $1.3k on EBay – sourced from China so I wasn’t sure what to expect, but it turns out to be exactly what I hoped I had bought. As an old-guy, getting my hands on an overpowered 64 core monster like this seems amazing given that I started with the most basic 8-bit computers that cost an arm and a leg back in the early 1980’s. For this build, I had to buy drives, memory, power supply, case etc. (all of which were new) so the total build cost is more than I want my wife to know, but I am very happy with how it is coming on.

Assembly of the system has been straighforward although it took longer than I initially expected because I needed the odd additional cable and such, but nothing that impacted actual performance (more for aesthetics). Note that the motherboard does not have connectors for some of the case front ports (usb c etc.). I will likely leave these dead, but you can buy an add on pcie card that can connect to these if required (I just run power and ethernet to my server – no keyboard, monitors or usb devices. I can access the machine via the IPMI device which is…awesome to a guy coming from using consumer motherboards for running servers)

Performance wise this has yet to be put through sustained trials, but I have already been testing and recording the power consumption (using a COTS power meter) and system temperatures under no-load and all-core loading (via simple stress-ng, htop and sensors command line utilties on Ubuntu 20.04).

Here’s a quick-look summary of some of the stress/temperatures/power-draw I am seeing in this setup:

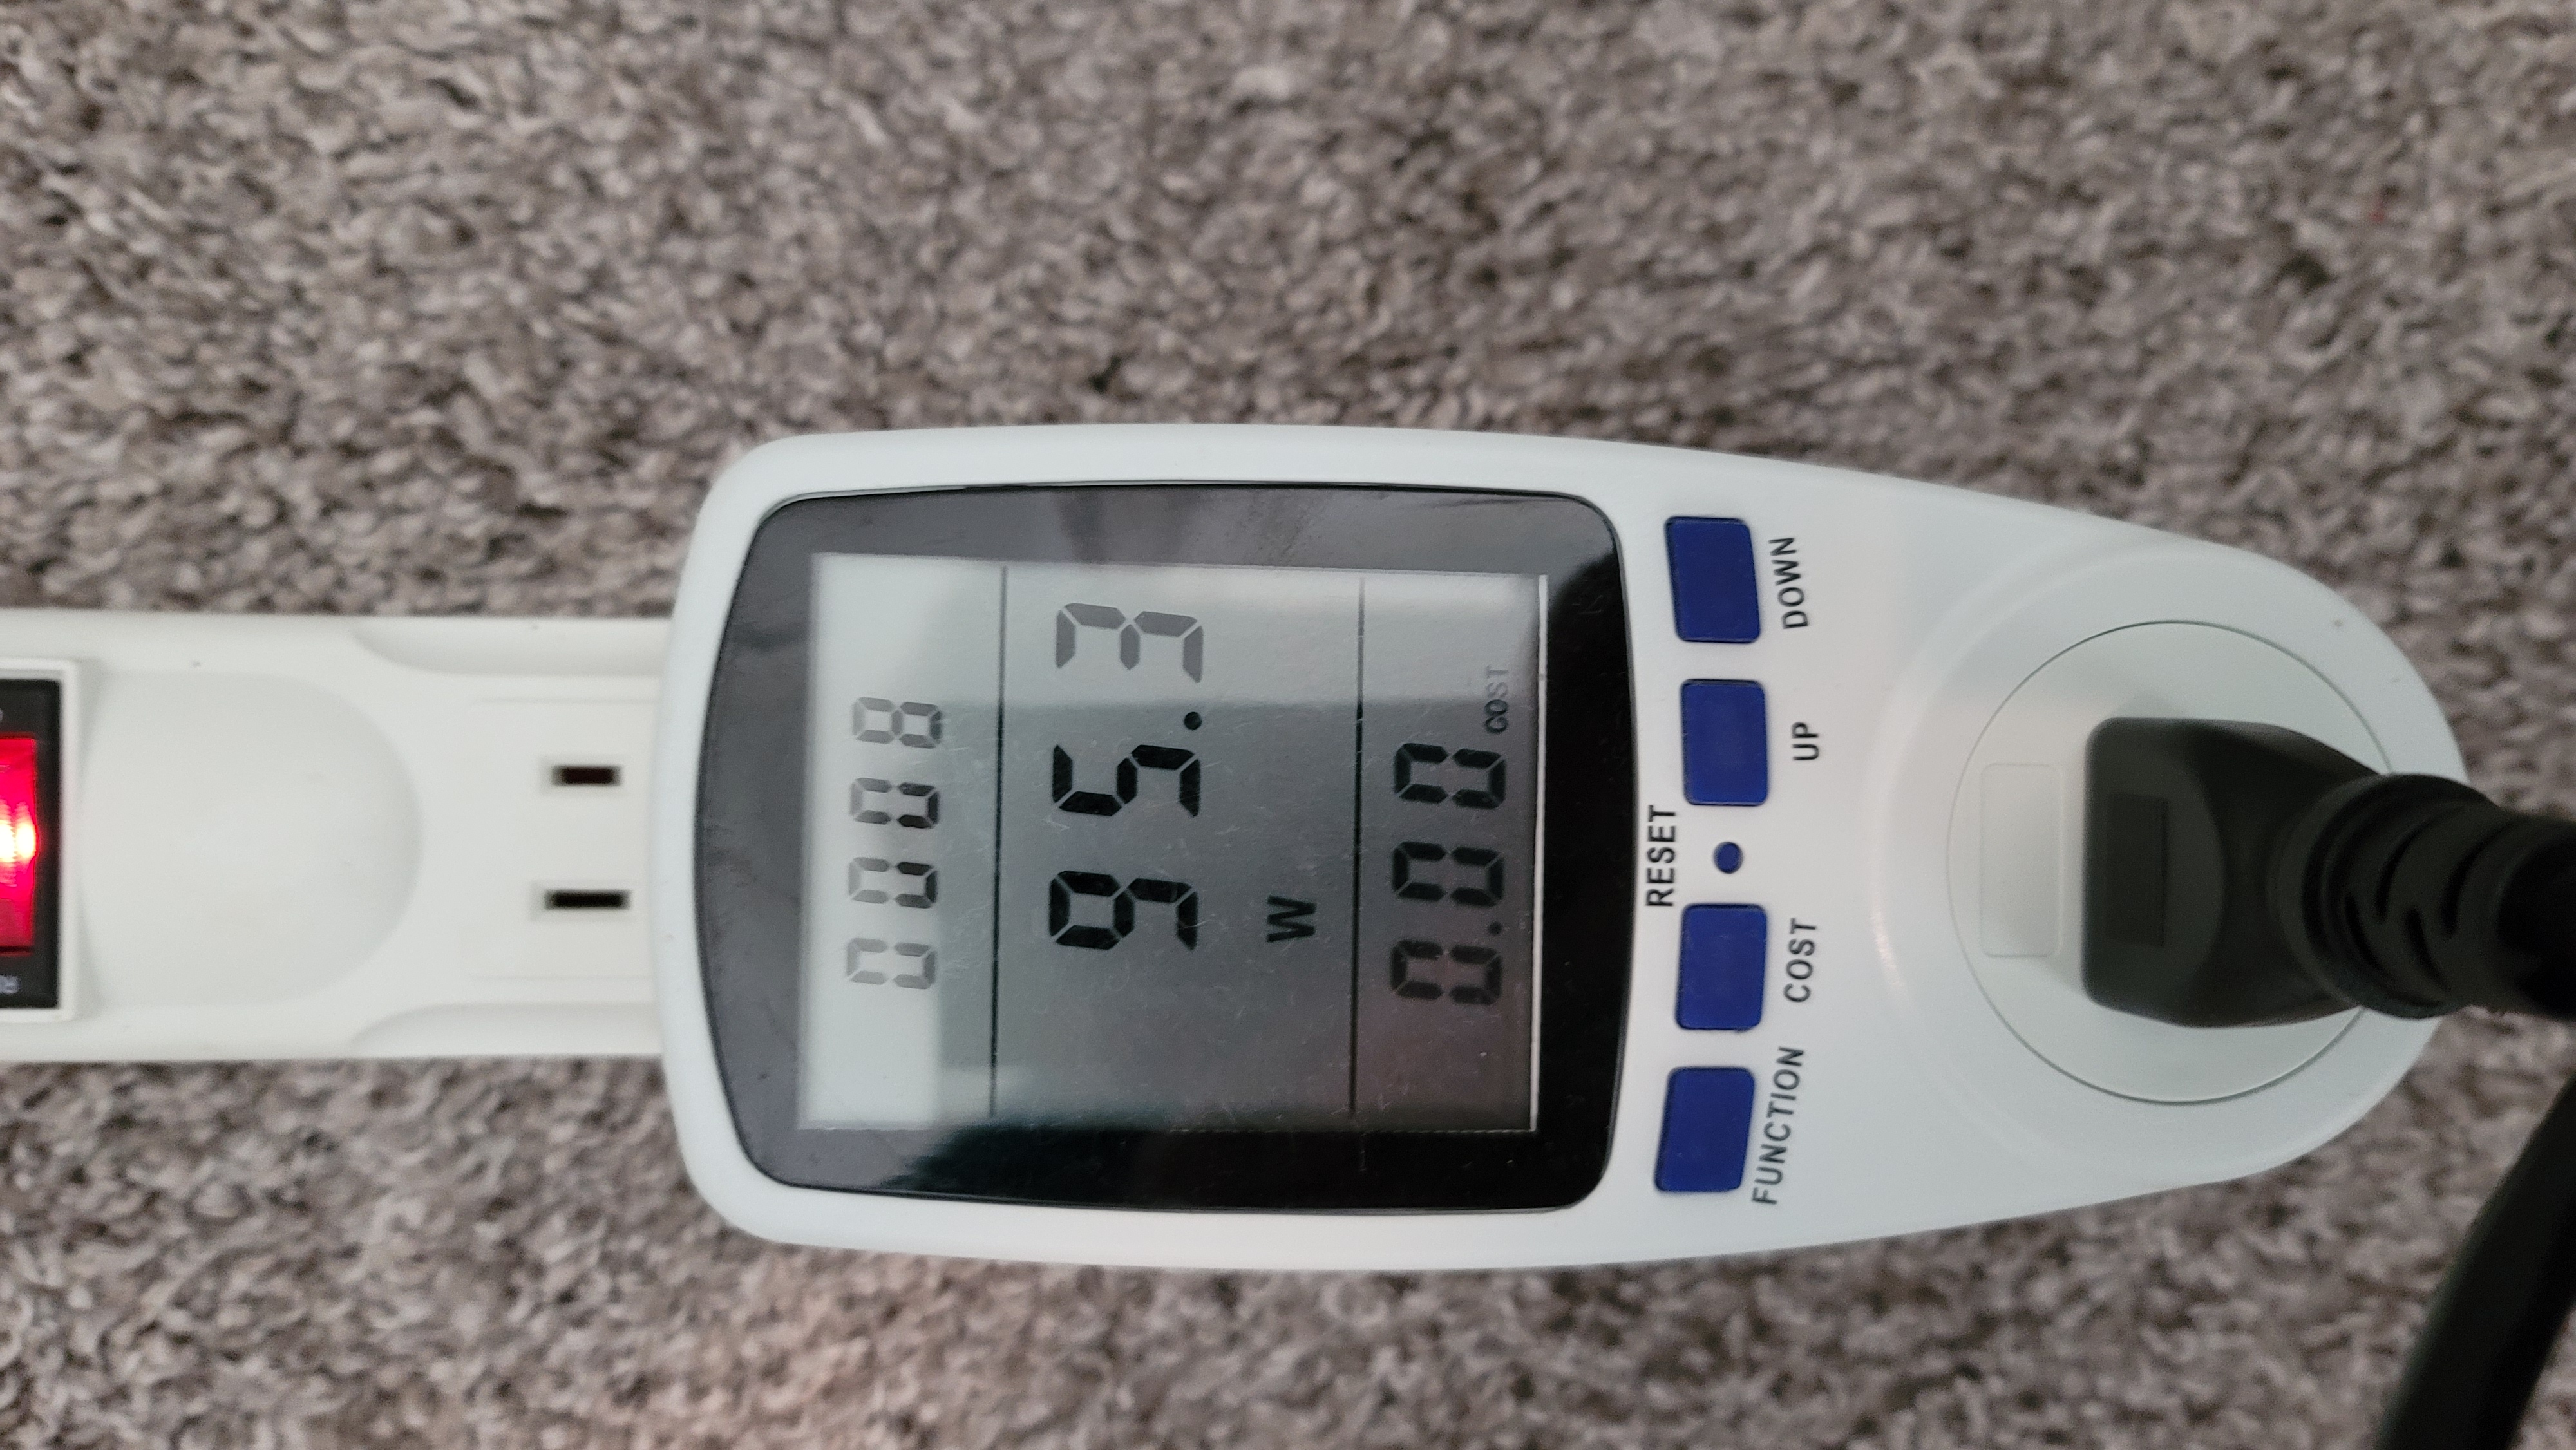
No load – drawing less 100 Watts of power from the outlet – pretty reasonable
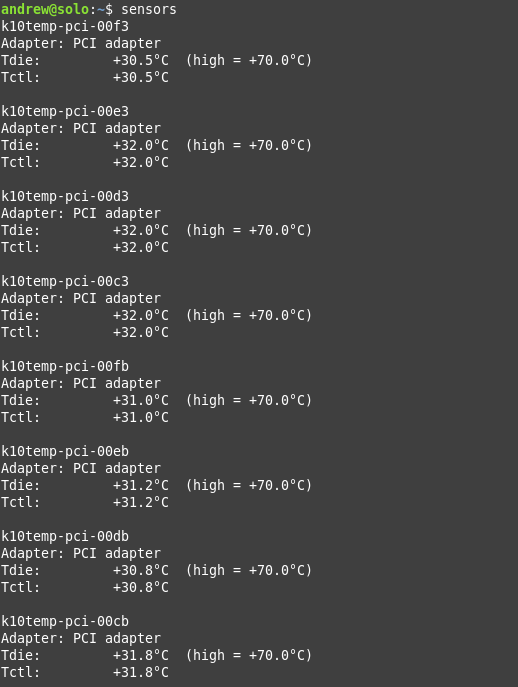
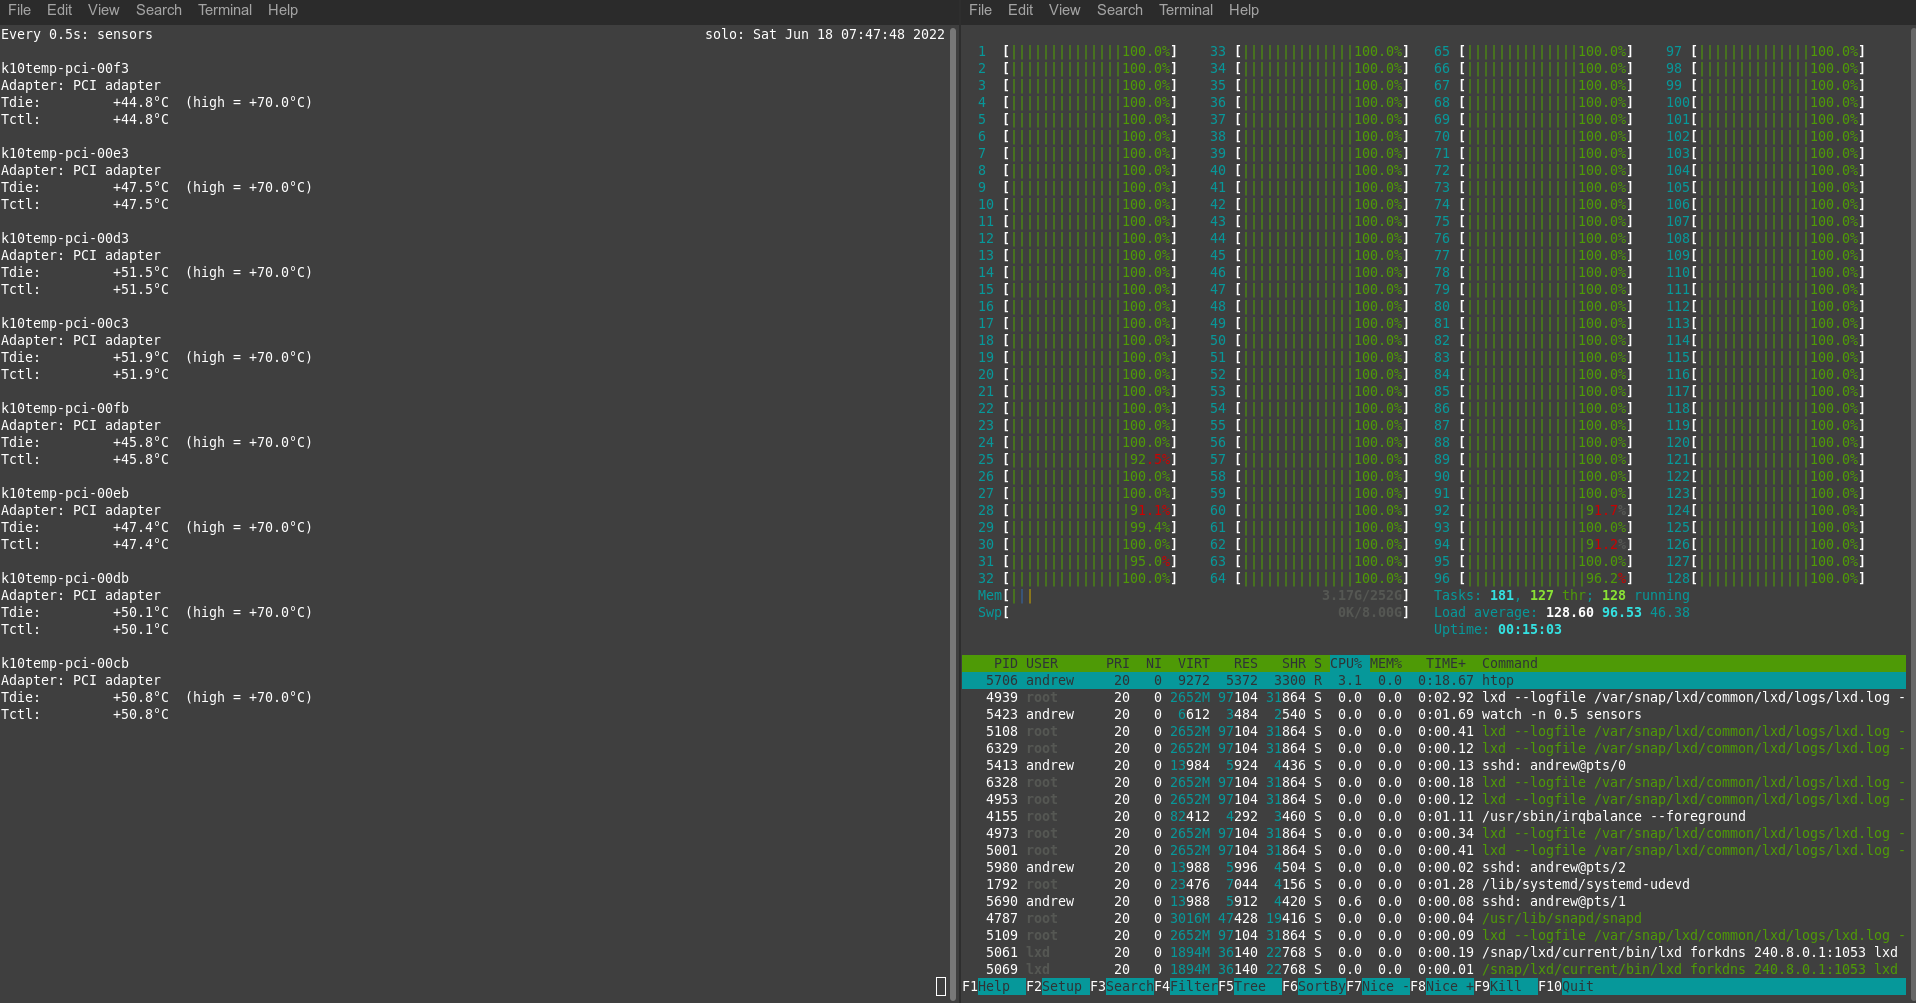
Temperatures under no-load conditions (CPU’s 2 and 1 are respectively k10temp-pci-00e3 and -00d3). Very respectable temperatures in an ambient environment of ~24C.
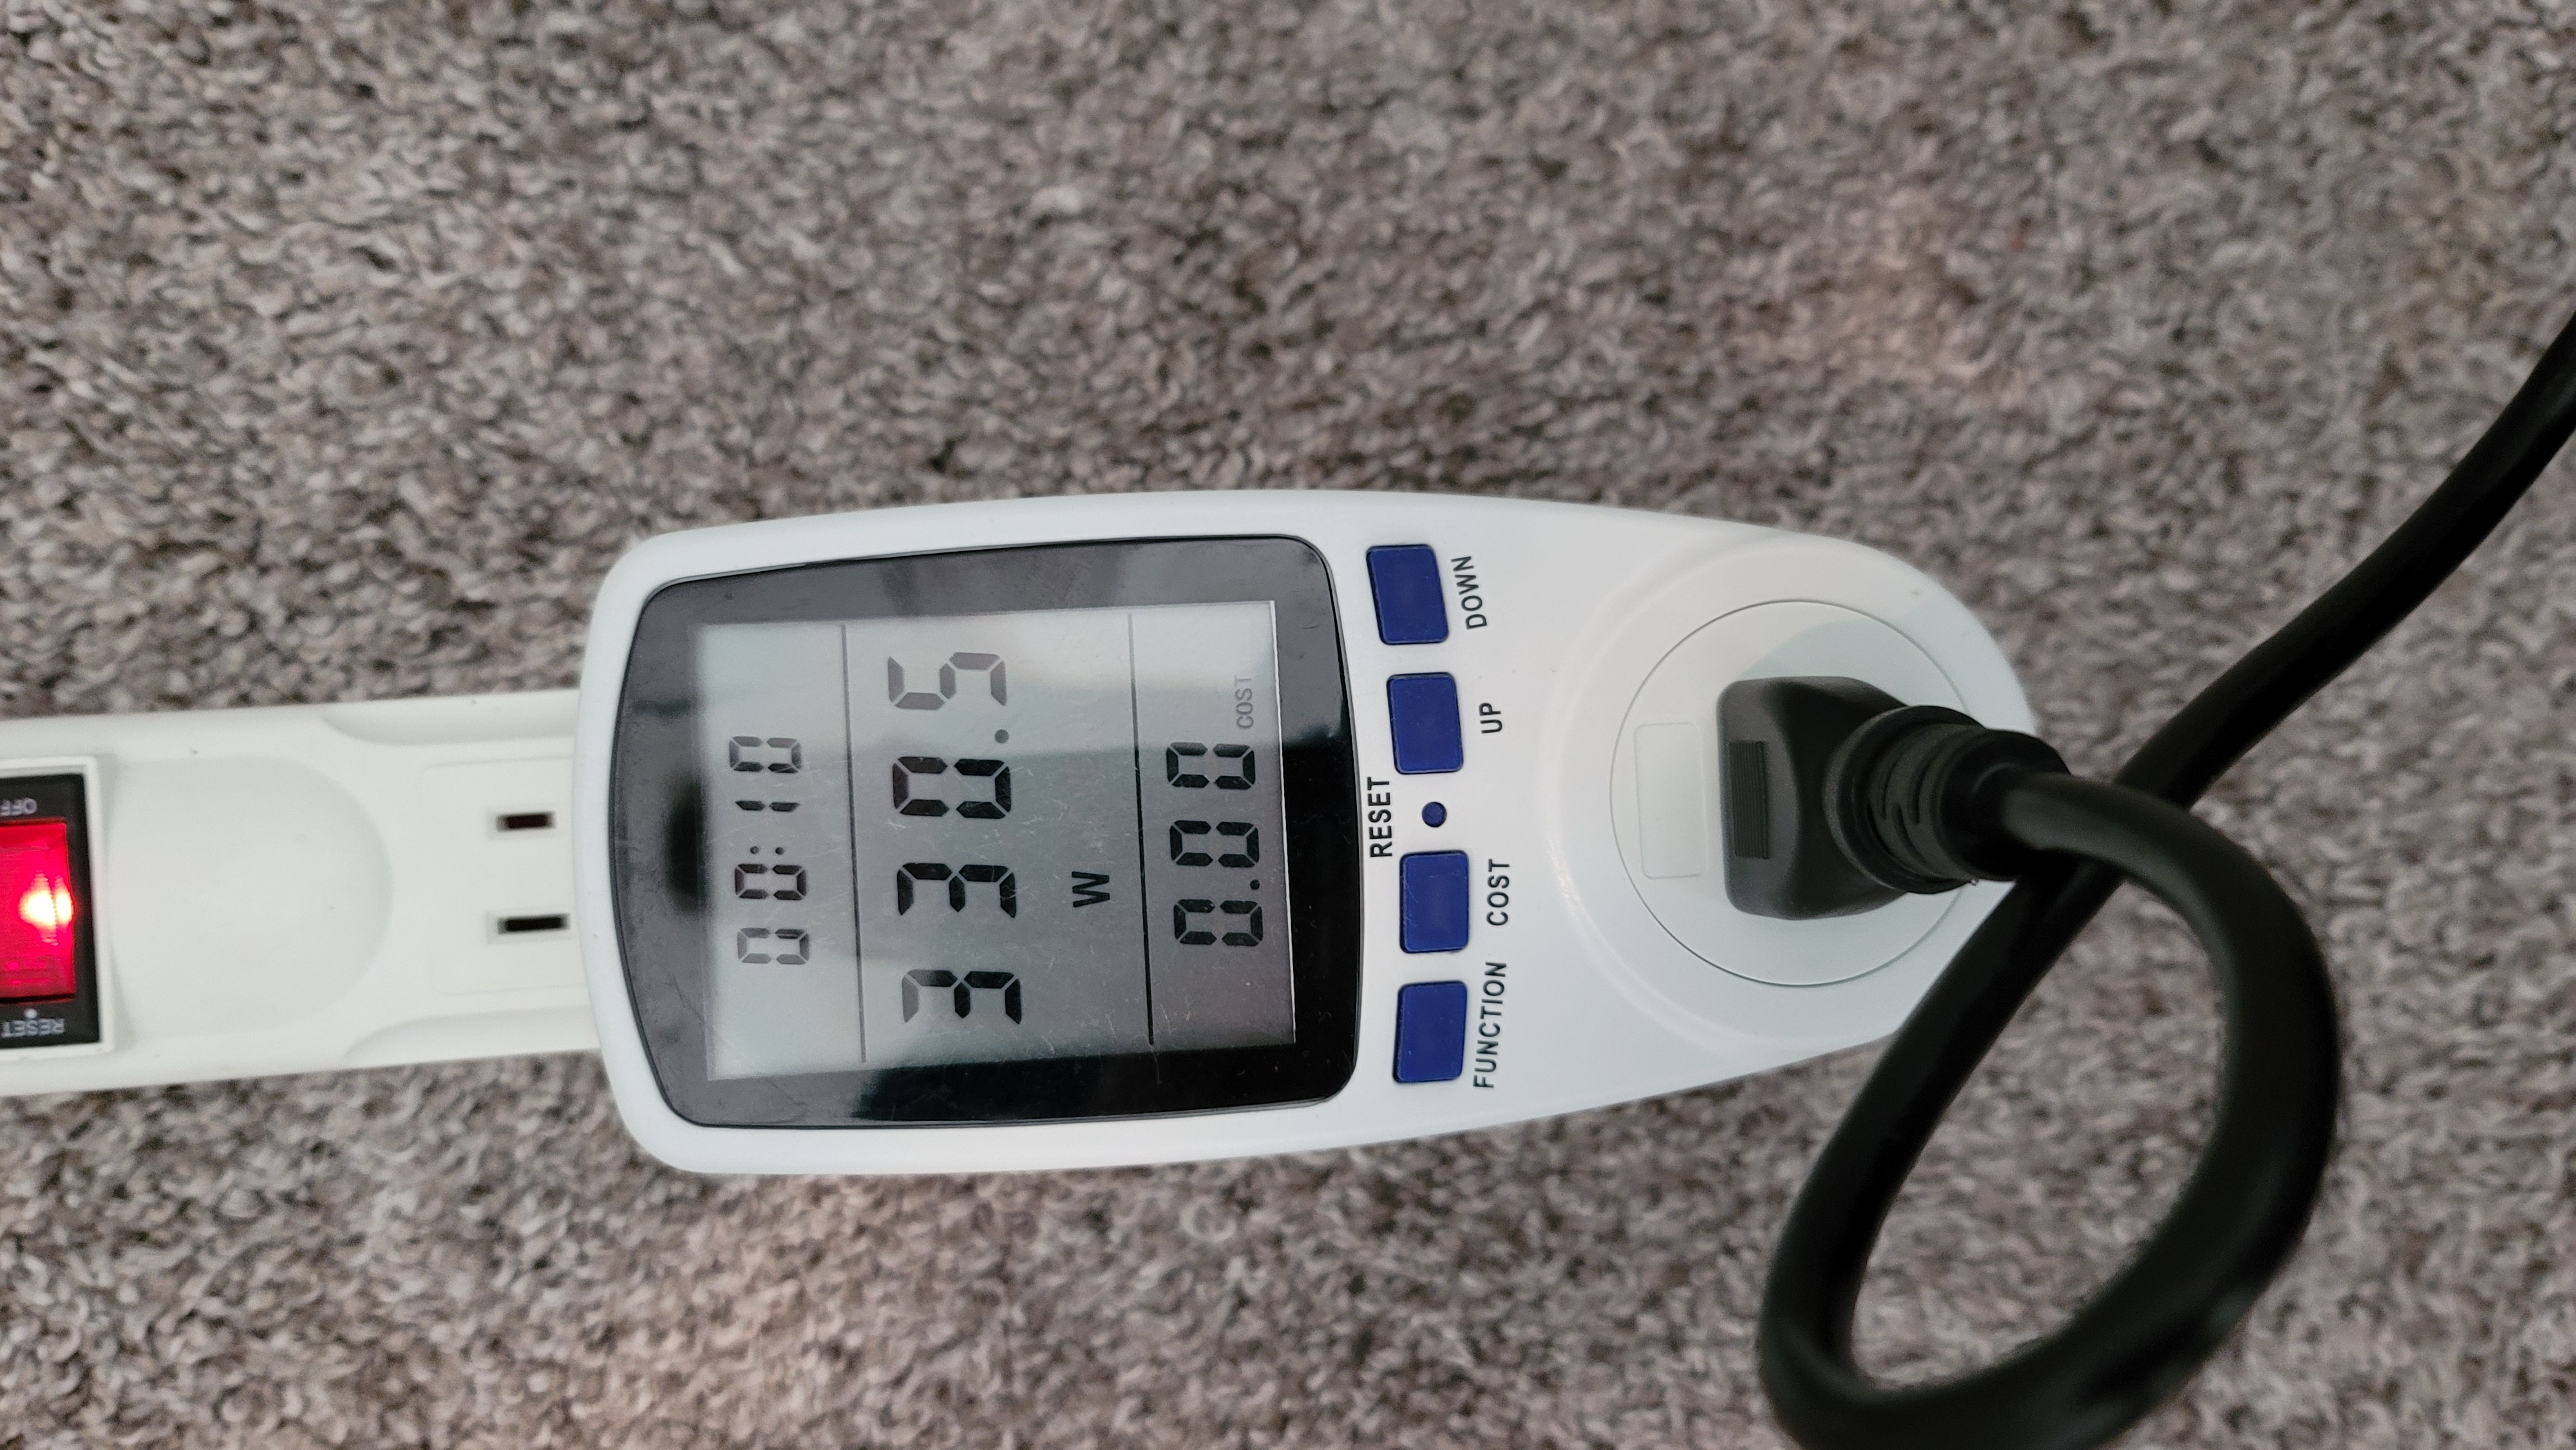
Power consumption from the outlet at max load (all 64 cores @ 100%, via stress-ng command line tool running on Ubuntu)
This shows temperatures of all 65 cores (128 threads) at max loading – very respectable

The above is a simple summary, but it shows the excellent ventilation and cooling fans of the Torrent and the Noctua CPU coolers can easily tame this system – 48-50C for the CPU’s is well within their operating temperatures, and I may actually get better than that once I setup some ipmi fan profiles to increase system cooling under such high CPU loads. the above results were obtained under one of the standard supermicro IPMI fan profiles (“HeavyIO”), which is not especially aggressive. Noise wise, I can’t hear this system at all under ambient conditions, and barely under load. I may try to quantify that once I have everything setup.

Under load, the CPU’s do not overheat but it quickly raises the ambient temperature of my workspace a few degrees as notably warmer air emerges from the rear vents of the Fractal Torrent (I may need to beef up my AC…). I consider this just stunning cooling performance from the Torrent/Noctua’s.

Temperatures and power draw will increase as I finish out my build (more hardware/drives), but I can already see that the viability of this server setup in a Tower case is very positive.

I will use this system, once it’s finally ‘production ready’ to be the primary server for my virtualized home services.

Acknowledgements:

I spent many an hour scouring the web looking for Epyc home server / tower builds before I pulled the trigger on this used hardware. For those looking to do something equally crazy, note that there’s not a lot of information out there. Wendell at level One Tech has some excellent videos some of which go back to Epyc first-gen (e.g. here and here). Jeff at Craft Computing has several excellent videos on his Epyc home servers (e.g. here). Finally, Raid Owl has an informative and entertaining video on a more modern setup too (here). Thanks to all of you for the free, informative and entertaining content you provide! 🙂

If you have any questions, you can reach me on Twitter – Andrew Wilson, @OGSelfHosting

Categories
Jus' Blogging

Self Hosting – my ‘why’

Welcome! My name is Andrew Wilson, and I run & self-host this site.

Self-hosting software/services is neither simple nor easy, but it is simple-enough and easy-enough for even an Old Guy to do it. It’s what I do, and I plan to use this site to blog my self-hosting journey.

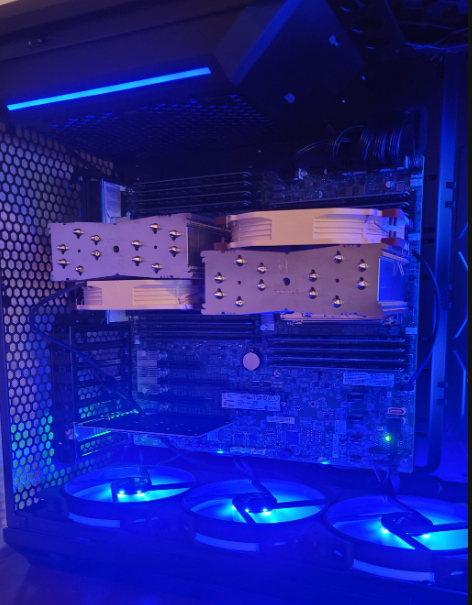
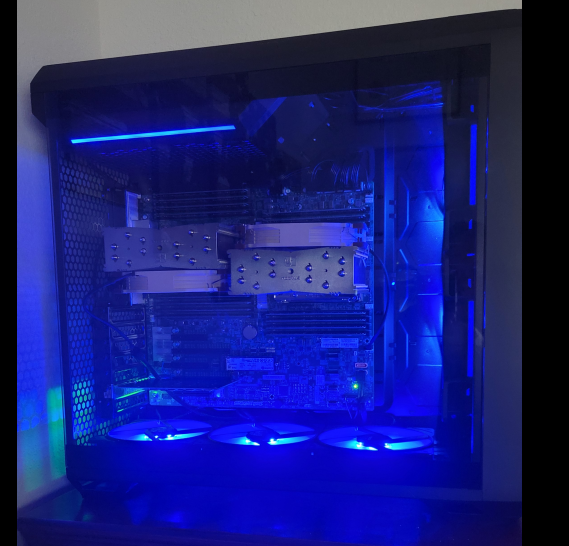
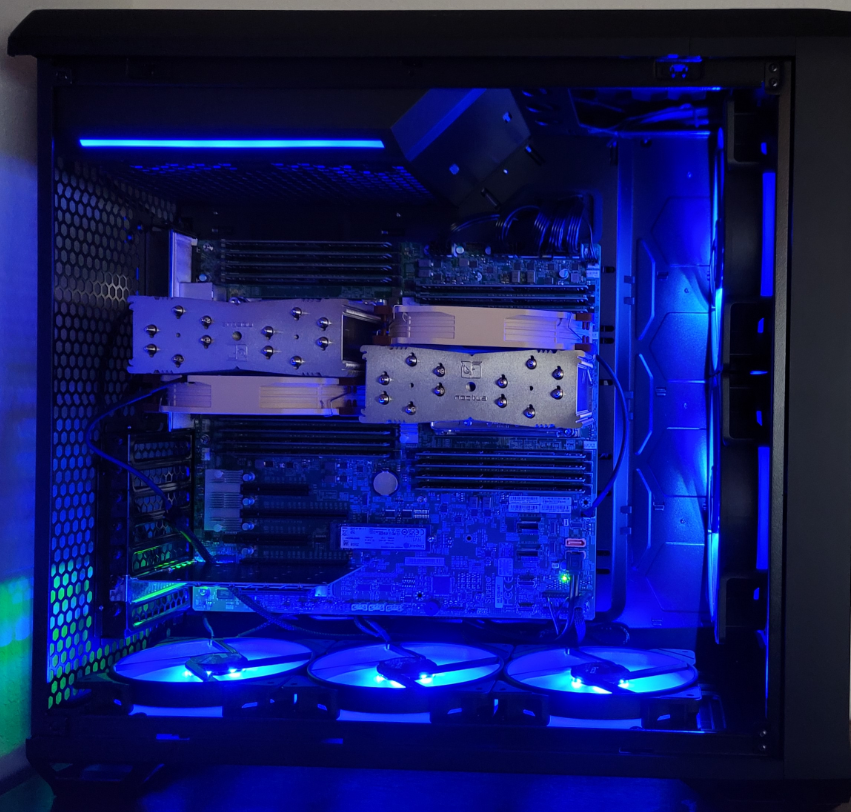
This is my over-the-top hardware running all of my home services. It’s a dual cpu based, first-gen EPYC server home build in a Tower Case. More power than I can possibly use, delivered whisper quiet, even under load.

I operate several services that I have come to appreciate and rely upon, and as I am now a stones-throw away from retiring from my day-job, I plan to learn more about (i) self-hosting software services, (ii) build/operate and maintain my hardware, (iii) try to put it all together in a manner that reduces my exposure to hackers and bad-actors and (4) have FUN doing all this!

I also hope to post tutorials to share some of what I have learned on the way in the hope they can help folks who, like me, don’t have all the answers. 🙂

Find me on Twitter – Old Guy, Self-hosting – @OGSelfHosting

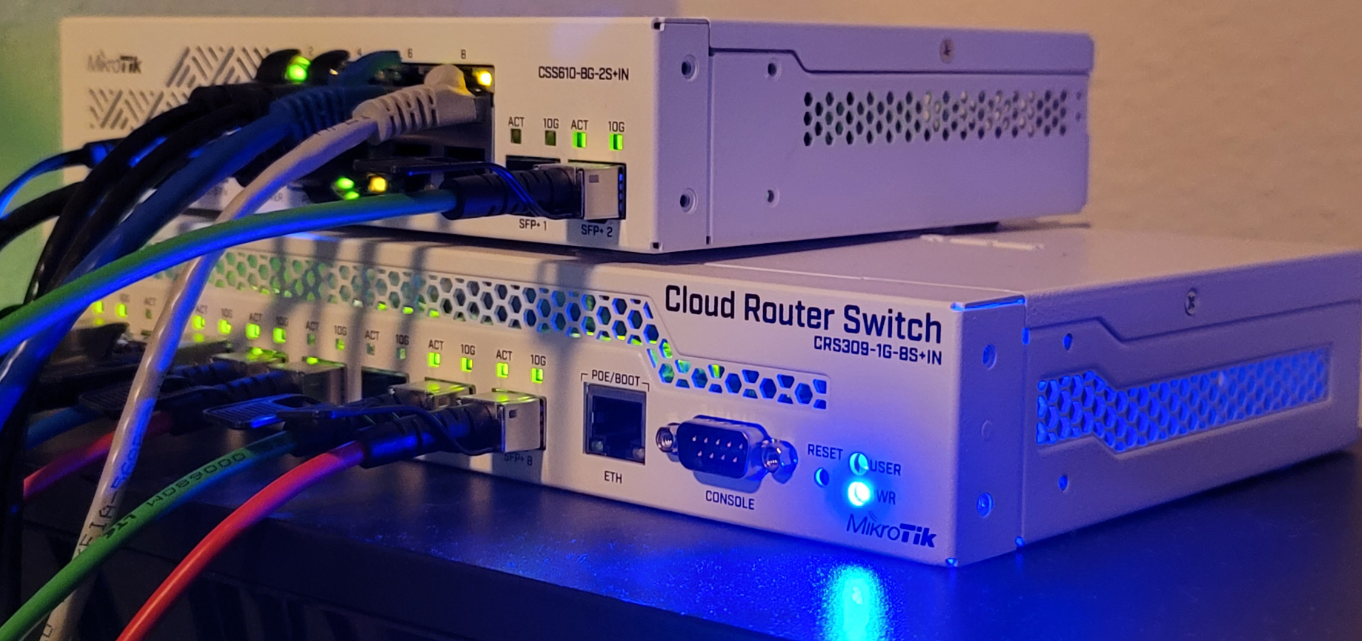
My home network runs via a vitualized instance of pfSense. and is supported by two Mikrotik switches that provide me with 10G network connectivity between my physical; servers.
Categories
Jus' Blogging

Privacy. It’s a big deal.

Monetizing our private information is the primary, if not sole strategy of many large corporations that provide ‘information services for free’. facebook, Microsoft, Google, Yahoo and too-many-to-list companies are constantly tracking, compiling and collating everything they know about us. So that in fact, they probably know more than anyone about you as an indivudal. And they rent or sell this information to, well, anyone with a credit card.

If you participate in the modern digital world, it’s not easy to eliminate all of those monetizing services. But there are some things you can do to reclaim some of your privacy. This site has been set-up by me so I can provide some insights to my (continuing) journey to self-host services I like to use, and which helps me reclaim some of my privacy.